Deep Learning and drones: first steps
Creating autonomous vehicles by using deep learning is an exciting application that everyone is trying right now. Just imagine if your car could move by its own around the city...wouldn't it be awesome?!
So what if you want to develop deep learning models for autonomous vehicles on your own? Well, here's the thing: you usually need a beefy GPU (or multiple GPUs 😢) just to run a simulation and collect your data. In this post, I am going to show you how you can do it, just using a modern CPU 🤠🤠
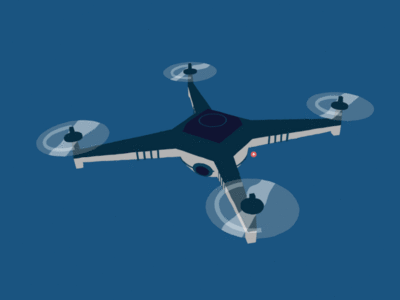
For a fast (and cheap) prototyping development, we will use the Ryze Tello drone as target device, as it's cheap (under 100€) and it provides an open SDK. Of course, if you have an autonomous car or professional-grade drone, use it instead! 😉😉
Multiple languages can be used to access the robots' APIs (C, C++, Java, etc.). For this project, Python 3 will be the main programming language (with a few blocks of C++).
Prerequisites
- A PC with Windows 10 or a Linux distribution (probably MacOS works as well), with at least 6-8 GB of RAM and a CPU with integrated graphics (I am using an i7-8565U with 8 GB of RAM). It'd be great to have a dedicated graphics card.
- A Python 3 installation (I am using an Anaconda environment). On Windows, you will need Microsoft's C++ build tools (troubleshooter here).
- Internet connection and at least 10-15 GB of disk space.
Step 1: Explore the current options
If you are not a experienced researcher on this topic, the first thing you have to know is that you need a simulator. You don't want to crash your real car while improving your learning model, do you?
Of all vehicle simulators out there, we are interesting in robotics simulators. The most fitted for our task are Gazebo, Webots and AirSim:
- Gazebo is the king of robot simulators. It is the most used and scalable one, although the API is clumsy and almost always it requires ROS.
- Webots is a recent player in the open-source league, as it was closed source until early 2019. It uses the same physics engine than Gazebo and provides a more versatile API with Python, Java and MATLAB support. It can also run on the web and...runs on Windows too!*
- AirSim is another new face in the team, as it is in the game from 2017. This is one of the only simulators intentionally created for autonomous vehicles. Aside from other projects, it runs on top of Unity and Unreal Engine, which provides a photorealistic look closer to reality. As with Webots, it also runs on Windows and provides multiple APIs other than C / C++ 😍
* Note: usually, robot simulators are only supported on Linux environments such as Ubuntu 16.04 or 18.04.
At first, we will explore AirSim, as it also provides packaged environments for testing and prototyping. However, Webots is the optimal choice if we want to develop a full application, as it doesn't require a dedicated GPU to run simulations. If you have a dedicated GPU, then don't miss the Porting to AirSim subsection at the end!
Step 2: Install and Quickstart
AirSim
This is, by far, the easiest installation process I have done for robot simulators 😍 AirSim provides packaged environments for Windows and Linux - if you are using MacOS, you will have to build AirSim. These environments contain multiple setups (a mountain area, a neighborhood, an office...) along with a programmable drone or car.
We will use the Blocks environment for Windows. We will also need the airsim package from pip (pip install airsim) - if you have installed Jupyter in the same environment, you may run into issues; I recommend to have both installations in different environments (add the airsim environment as a kernel!).
Once you have downloaded the environment, unzip it and run the executable in low resolution mode (start Blocks -ResX=640 -ResY=480 -windowed). It will ask to either use a car or a drone; choose the drone. Moreover, it also exposes the AirSim API via a msgpack server. Then, open a Python console and run:
import airsim
import os

# Create a directory to store images
os.makedirs("./images", exist_ok=True)

# connect to the AirSim API and enable the remote controller mode
client = airsim.MultirotorClient()
client.confirmConnection()
client.enableApiControl(True)
client.armDisarm(True)

# Take off! Note that it uses async methods
client.takeoffAsync().join()
# Then move to position (-10, 10, -10, 5)
client.moveToPositionAsync(-10, 10, -10, 5).join()

# take RGB images
responses = client.simGetImages([
  airsim.ImageRequest("0", airsim.ImageType.Scene),
  airsim.ImageRequest("1", airsim.ImageType.Scene)
])

for i, r in enumerate(responses):
  airsim.write_file(f"./images/image{i}.png", r.image_data_uint8)
The script above will enable the AirSim API, take off and move the drone, and it will also take 2 RGB images. It's that simple!
Webots
Download the installation package available at the landing page and open the app. I definitively recommend following the tutorial series (one and two) to get a grasp of how robot controller are developed.
Important! Check the Python version compatibility (depends on your OS).
Note however that a few changes are needed for Webots to use your custom Anaconda environment. Usually, Webots uses the default Python shell, so unless you have all the packages installed on it, you will need to configure it. Thankfully, it is as simple as abc:
- Go to your project's controller folder (if you don't have one, create it with Tools ➡ New Controller) and create a runtime.ini file.
- Activate your Anaconda/pyenv environment and run where python (Windows) / whereis python (Linux) to get the python shell path. Then, add it to the file like it's done here.
This will allow you to run the webots controller and to use external libraries such as numpy or tensorflow too.
As you could see from the tutorials, AirSim provides faster prototyping and a more realistic environment, although custom environments require a good GPU and knowledge of UnrealEngine or Unity development. In contrast, Webots can run on a mid-range laptop and uses common robot development practices, at the cost of simpler environments.
Step 3: A vision-based obstacle avoidance model
Be prepared! This step is under preparation 🛠